Concrete5 (35)


Working with queues in concrete5

A queue can be rather useful when you want to process a lot of data, but also when I just want to make sure things react quickly. Let’s have a look at a simple case where you might want to send an email.

In a lot of cases people send e-mails right in a controller action. This is okay for a lot of sites, but sometimes if things are mission critical it helps to use a queue. Imagine what happens if there’s a temporary problem with the mail system, since you’re sending it right in your controller you’ll probably show the user an error message telling him that something went wrong. Seeing errors is hardly ever a good thing, with a queue you could use a simple operation to put the action in a queue and process it later. If it fails you could try again a bit later and if it fails permanently put it in a log file you’re monitoring.

There might also be a maintenance task that you can finish before PHP times out. Using a queue would make it more solid, put every object you want to process in a queue and process it piece by piece.

Putting things in the queue

It’s fairly simple to put things the queue. All you need is a queue name to ensure you can keep your tasks apart and the data you need later to process the item from the queue:

use Concrete\Core\Foundation\Queue\Queue;
 
$queue = Queue::get('queue-demo');
$queue->send(1);

With this we are putting the number 1 in a queue called “queue-demo”. Now that we have objects in our queue we need to process them.

Processing queue

When processing a queue we obviously have to use the same queue name.

use Concrete\Core\Foundation\Queue\Queue;
 
$queue = Queue::get('queue-demo');
$queueMessages = $queue->receive(10);
foreach ($queueMessages as $msg) {
   $userId = $msg->body;
   // load the object for the user ID and process it
 
   $queue->deleteMessage($msg);
}

That’s basically all you need to do, but you’ll of course need to put that code somewhere.

concrete5 has an easy to extend CLI API. You derive a class from “Symfony\Component\Console\Command\Command”, implement the “execute” method and handle your queue there. Once you register your command, you can access it by running “./concrete/bin/concrete5”
You can find a complete example here: https://github.com/Remo/concrete5-queue-demo. Here are some of the relevant lines:

You’ll just have to run your command regularly to execute it, a cronjob like this should do the trick: “./concrete/bin/concrete5 queue-demo:process-notifications”.

There’s also a way to handle everything in a job which is especially useful for maintenance tasks as it doesn’t require that you add queue items initiaited by a user action. There’s a good article in the official documentation about this: https://documentation.concrete5.org/developers/jobs/creating-and-scheduling-a-queueable-job.

Benefits

  • Non-blocking executing of tasks
  • Avoid timeouts when handling a lot of data

Disadvantages

  • Adds a bit more complexity to your code
  • concrete5 queues require polling on the executing side, adding a delay to your task. Deosn’t apply to queues in general, if you use something like beanstalk you can process tasks immediately

Some of the code was written by Michele Locati. Hope you enjoy working with queues!


concrete5.7 – Custom Toolbar Button

concrete5 had an API to add a custom button to the inline editing toolbar. Here’s the article for the older 5.6 version: http://www.codeblog.ch/2012/04/concrete5-custom-toolbar-button/

In 5.7 a few things have changed. The idea is still the same, but you’ll have to use namespaces and loading classes is a bit different too.

Here’s how to get access to the menu helper:

1
$menuHelper = Core::make('helper/concrete/ui/menu');

You then have to call the addPageHeaderMenuItem method. Assuming you’ve already got a package, this is how the on_start method could look like:

1
2
3
4
5
6
7
8
9
10
11
12
13
14
15
16
17
18
public function on_start()
{
    $req = \Request::getInstance();
 
    // Make sure we don't inject our code if it's called by an AJAX request
    if (!$req->isXmlHttpRequest()) {
        /* @var $menuHelper \Concrete\Core\Application\Service\UserInterface\Menu */
        $menuHelper = Core::make('helper/concrete/ui/menu');
 
        $menuHelper->addPageHeaderMenuItem('ortic_btn', $this->pkgHandle, array(
            'icon' => 'question',
            'label' => t('Ortic'),
            'position' => 'right',
            'href' => 'http://www.ortic.com',
            'linkAttributes' => array('id' => 'ortic-button', 'target' => '_blank')
        ));
    }
}

Please note that we’re checking if the request is handled by an AJAX request. This can help to avoid collisions if you inject more things.

After that you’ll only have to create one more file in your package. Within “menu_items”, create a new folder with the button name, in my case “ortic_btn” (the first argument of addPageHeaderMenuItem ) and add a content like this:

1
2
3
4
5
6
7
8
9
10
11
12
13
14
<?php
namespace Concrete\Package\OrticToolbar\MenuItem\OrticBtn;
 
class Controller extends \Concrete\Core\Application\UserInterface\Menu\Item\Controller
{
    /**
     * Return false if you don't want to display the button
     * @return bool
     */
    public function displayItem()
    {
        return true;
    }
}

Please note that “OrticToolbar” refers to my package.

You can find the complete example on github: https://github.com/ortic/ortic-button


concrete5.7 Open Source Packages

concrete5 version 5.7 is out for a couple of month and as always with a major version, old stuff might is broken and it takes a while to find new packages, resources and information. I tried to assemble a list of open source packages for 5.7 which you can use in your project or learn from to build your own packages. Please note that some packages aren’t stable yet, it’s not a list for end-users but rather a list for concrete5 developers eager to learn about building add-ons.

Please let me know if I have missed a package, I’ll happily update my list.

Package URL Description

Add Multiple Pages https://github.com/Mesuva/add_multiple_pages Dashboard extension to add multiple pages in one go
Redactor anchors plugin https://github.com/csebe/anchors_redactor_plugin Redactor plugin to create anchors inside the edited text
Attribute Forms https://github.com/Remo/concrete5-attribute-forms Create forms usings attributes to get more flexibility, work in progress
Audio Player https://github.com/cpill0789/HTML5-Audio-Player-Basic Audio player
C5 Downloader https://github.com/tao-s/c5downloader Script to download and install concrete5
Cal Package https://github.com/olsgreen/cal_package Calendar functionality
CKEditor https://github.com/Mesuva/ckeditor_content Inline editor using CKEditor, doesn’t integrate file manager
CSV XML Converter https://github.com/hissy/addon_csv_xml_converter Create an XML file based on a CSV input you can import to your concrete5
site
Designer Content 5.7 https://github.com/concrete5japan/c5_designer_content_57 Create blocks for concrete5 using a visual interface
Developer Tools https://github.com/ExchangeCore/concrete5-Developer-Tools Developer Tools
Epicblue https://github.com/caomicc/Epicblue concrete5 theme
Fotorama Gallery https://github.com/olsgreen/fotorama_package Adds a block using the Fotorama gallery script
Foundation Sites https://github.com/core77/foundation_sites Package containing a theme and various block templates using foundation
Handsontable https://github.com/Mesuva/msv_table Inline block using Handsontable to create tables using an excel like
interface
LDAP Login https://github.com/go2sh/concrete5-ldap-login Package extending the authentication system
Lits files https://github.com/Mesuva/list_files_from_set Lists files from a file set
Mai Chimp https://github.com/core77/mail_chimp Block that let’s you signup to mailchimp newsletter lists
Manual NAV https://github.com/concrete5japan/Manual-Nav Build a navigation by manually assembling your pages
Multilingual Global Area https://github.com/hissy/addon_multilingual_global_area Makes global area global per language
Open Graph Tags https://github.com/hissy/c5-open-graph-tags-lite Add open graph tags to your site
Package Installer https://github.com/Remo/concrete5-package-installer Allows you to upload a ZIP file containing a package to be instaled
Persian Payment for VividStore https://github.com/Shayan66/parsian_payment_vividstore Persian Payment for VividStore
Plain Text Attribute https://github.com/Remo/concrete5-attribute-plain-text Attribute to add static text, useful in combination with attribute forms
QR Code https://github.com/Remo/concrete5-qr-code Block to embed QR code in your website
Razor Commere https://github.com/RazorCommerce/razor-commerce/ An e-commerce solution
Sakan https://github.com/concrete5japan/sakan theme based on bootstrap 3
Snow Drift https://github.com/mkly/Snow-Drift concrete5 theme
Social Share https://github.com/hissy/c5_social_share_lite Adds share icons to your site
Stop Forum SPAM https://github.com/ExchangeCore/Concrete5-Stop-Forum-Spam SPAM protection add-on
SVG Image https://github.com/Mesuva/svg_image SVG image with a bitmap fallback
Tweet Feed https://github.com/olsgreen/tweet_feed_package Adds a twitter feed to your site
Under Construction https://github.com/mkly/Under-Construction Adds an under construction page
Vanity URLs https://github.com/mkly/Vanity-Urls Let’s you access user profile pages using /@username
Vivid Store https://github.com/VividWeb/vivid_store An e-commerce solution


concrete5.7 upgrade packages

As you might have heard, a major release of concrete5 has been published. If you haven’t, here’s a list of things that have changed http://www.concrete5.org/documentation/background/version_history/5-7-0/.

In this post, I’m going to look at the process of upgrading an existing package which worked for version 5.6. I’m doing this step by step to show to show you possible error messages which might help you convert you own packages, but please note that I’m aiming at concrete5 developers knowing version 5.6 and will thus skip a few things which haven’t changed.

I’m going to use a simple package I wrote a while ago, it’s the zoom image block which allows you to zoom into a single image. Much like lightbox, but limited to a single picture. The code can be found here https://github.com/Remo/concrete5-zoom-image.

The Directory Structure of concrete5.7

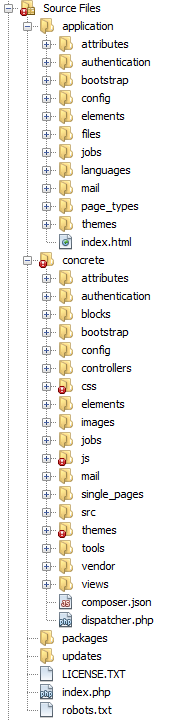
Once you’ve downloaded and installed concrete5.7 you’ll probably see that the directory structure has changed quite a bit:
concrete5.7 directory structure

  • The root directory
    • There are only four directories left
    • application – this is where your overrides for your own site should be placed
    • concrete – this is still the core and should never be touched unless
    • packages – this is obviously the place where you have to add your own packages
    • updates – still the same, here’s where you can find an updated core
  • What new directories are there
    • authentication – there’s a pretty neat authentication system you can extend, by default there’s a built-in concrete5 system and one supporting facebook
    • bootstrap – as the name tells you, here’s where things get started, loaded etc.
    • src – this is where you can find the PSR4 auto-loaded classes, have a look at this directory to get acquainted with the new things in concrete5
    • vendor – version 5.7 partially uses composer.json to manage dependencies, this is where you can find the libraries installed by composer

Installing the zoom image package

Before you install anything, make sure you’ve got a database dump you can easily restore, it might make things easier.

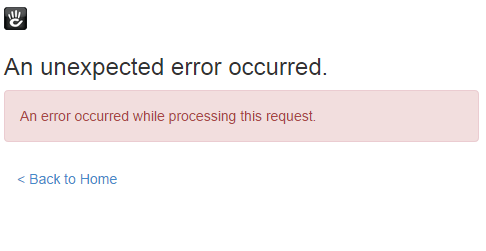
I simply downloaded the latest version from github and placed it in a directory called zoom_image in the packages directory. In concrete5, type add functionality in the search box and select the first item. You’ll already see your first exception at this point:

concrete5.7 exception.

We can’t see any details about the error, now what? You can either look at your database and check the content of the Logs table or go back and type debug in the search box. Navigate to debug settings and check Show errors in page.. If you then to back to install your package, you’ll see a nice output produces by https://github.com/filp/whoops. It tells use, that we can’t redeclare the class ZoomImagePackage. That’s because concrete5.7 uses namespaces for pretty much everything. To get around this problem, we have to update the controller in our package. The first few lines have to look like this:

1
2
3
4
5
6
7
8
9
10
11
<?php
 
namespace Concrete\Package\ZoomImage;
 
defined('C5_EXECUTE') or die('Access Denied.');
 
class Controller extends \Concrete\Core\Package\Package {
 
    protected $pkgHandle = 'zoom_image';
    protected $appVersionRequired = '5.7.0';
    protected $pkgVersion = '2.0.0';
  • A package controller class is always called Controller.
  • It derives from \Concrete\Core\Package\Package
  • The namespace of your package controller has to start with Concrete\Package\ and must then be append with the camelcased name of your package.
  • I also updated the number to be 2.0.0, that’s not necessary, but probably make sense

When you reload the add functionality page again, you’ll finally see our package. Let’s try and install it! Next error:
Class 'Concrete\Package\ZoomImage\BlockType' not found. As I’ve mentioned above, the src directory contains some rather useful classes. We’re looking for something related to blocks and no surprise, there’s a Block directory. If you look at src/Block/BlockType/BlockType.php you can see where the missing class is. Open the file and you’ll know the namespace we have to import.

1
2
3
4
5
<?php
 
namespace Concrete\Package\ZoomImage;
 
use Concrete\Core\Block\BlockType\BlockType;

Unfortunately the package got installed anyway and uninstalling can be tricky if parts of your code haven’t been upgraded for 5.7. Let’s just restore that dump file we’ve created and try to install the package again. Guess what, the next exception. The zoom image block uses an old out-dated method called Loader::block. Remove it, restore the dump file and try again. Next, you’ll get an exception because BlockController isn’t defined. Namespaces again! While we do this, we can also make the class name change like we did with the package controller.

  • The class is simply called Controller too.
  • You’ll have to derive it from \Concrete\Core\Block\BlockController. If you look at the code below, you can see that I didn’t specify the fully qualifier name when deriving the class but rather added another statement to use.
  • Your namespace has to be Concrete\Package\[camel-case-package-handle]\Block\[camel-case-block-handle]

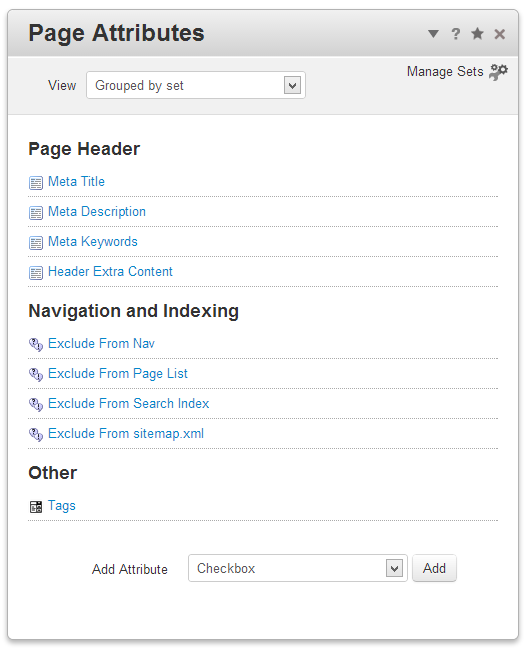
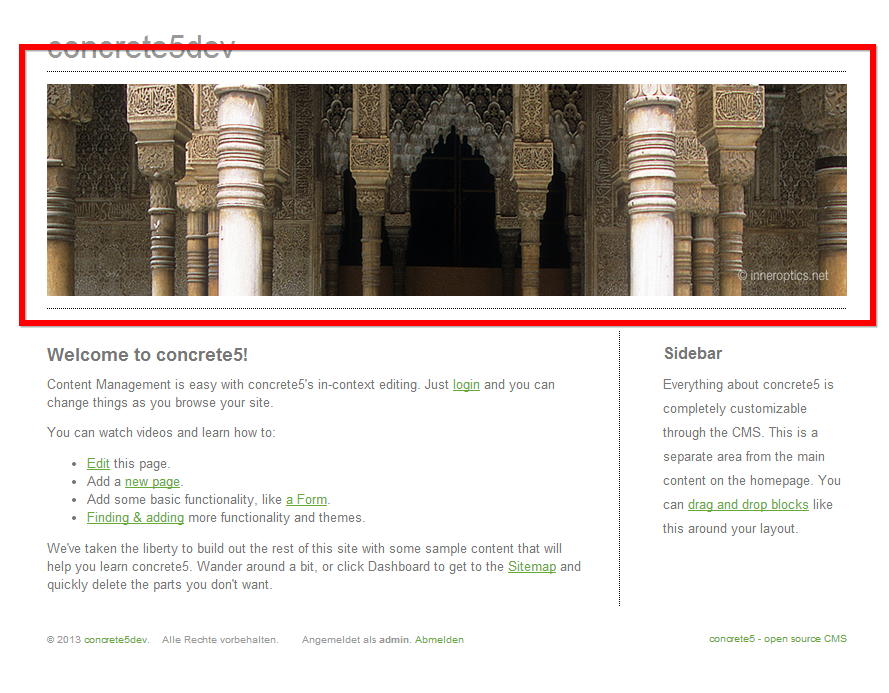
After making these changes, restore the dump file and install the package again – the installation process works! Now let’s try to add a zoom image block. Go back to the website and hit the plus icon:

concrete5.7 add block

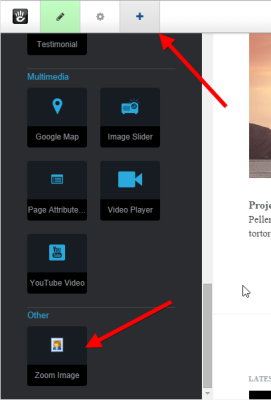
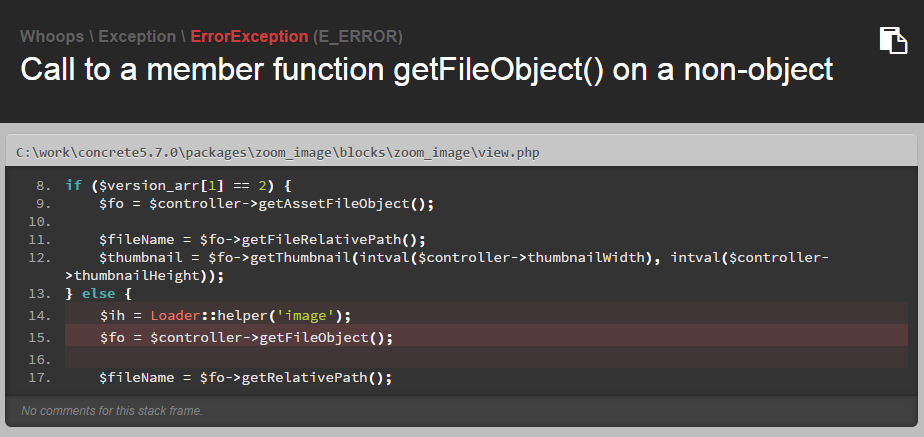
Drag your block into the page and release it. The block interface shows up, but after adding the block, nothing happens. That’s because the AJAX magic hid the error message, reload the page and you’ll get your next exception to work with Class 'Concrete\Package\ZoomImage\Block\ZoomImage\File' not found. As you can see, it tries to load the class File in our own namespace where it can’t be found. We forgot to add another use statement. Let’s add \Concrete\Core\File\File and reload the page.

We now get the message Call to a member function getFileObject() on a non-object.

concrete5.7 exception 2

Accessing the controller from view.php was a bit of a habit when you looked at code back from version 5.0 and a bit later. Before we worry about the message, let’s make sure we properly forward data from the controller to the view and not the other way round.

Let’s add the following method to the block controller:

1
2
3
4
5
6
7
8
9
10
11
public function view() {
    $ih = Loader::helper('image');
 
    $fileObject = $this->getFileObject();
 
    $fileName = $fileObject->getRelativePath();
    $thumbnail = $ih->getThumbnail($fileObject, intval($this->thumbnailWidth), intval($this->thumbnailHeight));
 
    $this->set('fileName', $fileName);
    $this->set('thumbnail', $thumbnail);
}

Use those variables in your view.php and then try to reload the page. No error messages for a change, but when you publish the page changes and try to click on the thumbnail of your block, nothing happens. If we check the error console of the browser, we can see a problem due to undefined jQuery variables. At the time when our javascript gets executed, jQuery isn’t loaded. We don’t think too much about it and simply use addFooterItem instead of addHeaderItem.

Reload and still no luck, msie isn’t defined. But luckily that’s just because of our JavaScript which isn’t happy with the new jQuery version. Update the script to get around that.

That’s it! JavaScript fixed and no more problems, everything working! While this article is a bit long, what we actually did isn’t that much. In short:

  • Namespaced all of our controllers, the package and block controller
  • Made sure we properly forwarded our variables from the controller to the view (something I should have done before)
  • Fixed a problem because of the new jQuery version in concrete5.7

You can find the commit I’ve made on github, a proper diff file might help https://github.com/Remo/concrete5-zoom-image/commit/fa0895081b62fbbb53d8e79c00858619fcec1fd4.

Have fun with 5.7!


concrete5 – Working with custom Permission Keys

When you build an add-on with concrete5, you’ll sometimes want to hide a few things depending on the users or group. You might be tempted to hard-code a check to a specific group, but there’s a much more elegant way to handle this. It also gives you a lot more power to control who’s allowed to do something, just in case your customer changes.

In this tutorial, we’re building a new package called “codeblog_task_permissions” which you have to put in your “packages” directory. Within the new package directory, create a new file called “controller.php” and put the following content in it, we’ll have a closer look at what it does afterwards:

1
2
3
4
5
6
7
8
9
10
11
12
13
14
15
16
17
18
19
20
21
22
23
24
25
26
27
28
29
30
31
32
33
34
35
36
37
38
39
40
41
42
43
44
45
46
47
48
49
50
<?php
 
class TaskPermissionsPackage extends Package {
 
    protected $pkgHandle = 'task_permissions';
    protected $appVersionRequired = '5.6.3';
    protected $pkgVersion = '1.0';
 
    public function getPackageDescription() {
        return t("Installs the Task Permission demo package.");
    }
 
    public function getPackageName() {
        return t("Task Permissions");
    }
 
    public function install() {
        $pkg = parent::install();
        $this->installTaskPermissions($pkg);
    }
 
    /**
     * This method installs our permission keys
     * 
     * @param Package $pkg
     */
    protected function installTaskPermissions($pkg) {
        // add a new permission key to handle shutdons
        $pkShutdownHandle = 'shutdown_planet';
        if (!is_object(PermissionKey::getByHandle($pkShutdownHandle))) {
            $pkShutdown = PermissionKey::add('admin', $pkShutdownHandle, t('Shutdown the planet'), t('Permission to shutdown the planet'), '', '', $pkg);
 
            // assign administrators the right to handle our planet
            $group = Group::getByID(ADMIN_GROUP_ID);
            $adminGroupEntity = GroupPermissionAccessEntity::getOrCreate($group);
 
            $pa = PermissionAccess::create($pkShutdown);
            $pa->addListItem($adminGroupEntity);
            $pt = $pkShutdown->getPermissionAssignmentObject();
            $pt->assignPermissionAccess($pa);
        }
 
        // install a second permission key to control the weather
        $pkWeatherHandle = 'make_weather_nice';
        if (!is_object(PermissionKey::getByHandle($pkWeatherHandle))) {
            $pkWeather = PermissionKey::add('admin', $pkWeatherHandle, t('Remote Weather Control'), t('Access to the remote weather control system'), '', '', $pkg);
        }
    }
 
}

Let’s have a look at the simpler example. In line 44 we’re setting the handle of the permission key, it’s what we need to work with it when we run our check in the code. In the next line, we check if the permission key is already installed, if it isn’t, we add it. These are the parameters you can use:

public static function add(
        $pkCategoryHandle, 
        $pkHandle, 
        $pkName, 
        $pkDescription, 
        $pkCanTriggerWorkflow, 
        $pkHasCustomClass, 
        $pkg = false
)

That’s all we need to add a custom attribute key. If you install the package and navigate to “/dashboard/system/permissions/tasks/” in your dashboard, you’ll see your custom permission keys at the end of the screen.

permissionkeys

As you can see, our new permission key doesn’t have any groups assigned to it. You can either do that manually, or by code. In the example above, the first permission key shows you how to do that. Just have a look at the lines 33 to 40. We get an instance of our administrators group and then pass it along a permission access object which we can assign to our permission key.

Now that we have created our permission keys, we want to use them. This part is even easier, all you have to do is to create a PermissionKey object and run the “can()” method:

1
2
3
4
5
6
$pk = PermissionKey::getByHandle('shutdown_planet');
if ($pk->can()) {
    echo t('Yes you are allowed to shutdown the planet');
} else {
    echo t('We are sorry but you have no permissions to shutdown the planet');
}

You can find the complete example on github, https://github.com/Remo/codeblog/tree/master/codeblog_task_permissions. If you use the example and want to check the permissions, point your browser to http://1/index.php/tools/packages/task_permissions/check_permissions and you’ll see weather you have the permission to the keys or not.


concrete5 – use LESS files for block templates

If you built a couple of block templates, you’ll probably have had some nasty CSS code. Quite often you’ll have block specific options, a background color for example, which has to change the CSS file. You can easily do that, no doubt, just use addHeaderItem or put a style tag in your view.php. The block controller code might look like this:

1
2
3
public function on_page_view() {
   $this->addHeaderItem('<style type="text/css">#my-block-' . $this->bID . ' { background: ' . $this->backgroundColor . '; }</style>');
}

In most cases you’ll find situations where the developer mixed a code like shown above with an external CSS file.

That certainly works but it’s usually much more elegant to keep all the block related CSS rules in a single file. We can use the great LESS language to achieve a much more elegant solution. Wouldn’t it be great if you could put all the CSS rules in a file like this:

1
2
3
4
5
6
#my-block@{bID} {
   background: @backgroundColor;
   display: block;
   width: 100px;
   height: 100px;
}

That’s possible, it just takes a bit more code. You’ll need lessphp available here http://leafo.net/lessphp/. In your block controller, you can use a method like this to compile a LESS file like the one shown above into a static CSS with all variables replaced on the fly if required. Here’s the code:

1
2
3
4
5
6
7
8
9
10
11
12
13
14
15
16
17
18
19
20
21
22
23
24
25
26
27
28
29
30
31
32
33
34
35
36
37
public function on_page_view() {
    // get current block template
    $template = $this->getCurrentTemplate();
 
    $bv = new BlockView();
    $bv->setController($this);
    $bv->setBlockObject($this->getBlockObject());
 
    // build path to less file
    $blockPath = $bv->getBlockPath();
    if ($template == '') {
        $blockTemplateLessPath = $blockPath . DIRECTORY_SEPARATOR . 'view.less';
    } else {
        $blockTemplateLessPath = $blockPath . DIRECTORY_SEPARATOR . 'templates' . DIRECTORY_SEPARATOR . $template . DIRECTORY_SEPARATOR . 'view.less';
    }
 
    // there's a less file, check if we have to rebuild it
    if (file_exists($blockTemplateLessPath)) {
        $lessFileHash = md5($blockTemplateLessPath . $this->bID . filemtime($blockTemplateLessPath));
        $cacheFile = DIR_FILES_CACHE . '/my-block-' . $lessFileHash . '.css';
 
        // cache file doesn't exist, rebuild it
        if (!file_exists($cacheFile)) {
            $lessc = Loader::library('3rdparty/lessc.inc', 'my_block');
            $lessc = new lessc();
            $lessc->setVariables(
                    array(
                        'backgroundColor' => $this->backgroundColor,
                        'bID' => $this->bID
                    )
            );
            $lessc->compileFile($blockTemplateLessPath, $cacheFile);
        }
 
        // include generated css file
        $this->addHeaderItem('<link rel="stylesheet type="text/css" href="' . REL_DIR_FILES_CACHE . '/cover-picture-' . $lessFileHash . '.css' . '"/>');
    }

If these instructions were a bit short, you can find a working example in one of my github repositories, check this: https://github.com/Remo/concrete5-cover-picture/blob/master/blocks/cover_picture/controller.php#L43-L81.

I hope this helps you to clean up your code!


concrete5 – searching and cloning pages

In this short tutorial I’ll show you two different things. We’ll start with a simple example that explains one function of the PageList class and then another method you can use to duplicate a page.

Searching for pages by an attribute with PageList

The PageList class is very powerful, especially in combination with attributes. In order to be able to search after an attribute, we’ll create a new attribute called “Duplicate this Page”. We’ll use it to mark pages we’d like to clone. First, open the attributes page (/index.php/dashboard/pages/attributes/) and select the checkbox type like shown here:

page_attr

Click on the “Add” button and create the attribute using these values:

page_attr_detail

Now go back to the sitemap and pick a few random pages and assign the new attribute to them and tick the checkbox. Let’s have a quick look at some code. We’ll create a new file called “test.php” in the “tools” directory.

1
2
3
4
5
6
7
8
9
10
// build PageList object to get all pages where the attribute
// with the handle "duplicate_page" is checked
$pl = new PageList();
$pl->filterByDuplicatePage(true);
 
$pages = $pl->get(0);
 
foreach ($pages as $page) {
    echo $page->getCollectionName() . '<br/>';
}

When you now open /index.php/tools/test/ you’ll get the names of all pages where you’ve assigned our new attribute.

The PageList class has a magic method with which you can search for attribute values in an elegant way. Simple append the handle in CamelCase notation after “filterBy”. Your attribute handle is “very_lovely_day”, use $pl->filterByVeryLovelyDay(…); This works not only with checkbox attributes but with almost all attributes you can find.

Cloning pages

Assuming we’d want to copy those pages to a new location, we could easily use the “duplicate” method. But first, create a new page in the sitemap underneath you want the cloned pages to appear. Mine is called “Target Container” and hass the path “/target-container”. We use this in combination with the script we wrote above to get the final result:

1
2
3
4
5
6
7
8
9
10
11
12
13
14
15
16
17
18
<?php
 
// get target container underneath which we'll create the cloned pages
$targetPage = Page::getByPath('/target-container/');
 
// build PageList object to get all pages where the attribute
// with the handle "duplicate_page" is checked
$pl = new PageList();
$pl->filterByDuplicatePage(true);
 
// return _ALL_ pages we've found. If you have hundreds of pages
// you might want to use $pl->getPage(); and run the script several
// times
$pages = $pl->get(0);
 
foreach ($pages as $page) {
    $page->duplicate($targetPage);
}

When you open /index.php/tools/test again, you’ll get some clones in no time! But be aware, if you run the script again, you’ll get more clones.


concrete5 class loader

If if worked with concrete5 before, you’ll probably have seen lots of Loader::model or Loader::helper. A few versions ago these calls were pretty hard to avoid and you had to use them rather often. The core still doesn’t have namespaces due to the fact that the development of concrete5 has started when PHP didn’t know anything about namespaces. The class loader does help a lot though, even if there are no namespaces.

Here’s a simple example showing you how to load classes automatically.

All classes you want to load have to specified in an array in your package controller:

$classes = array(
    'TestClass' => array('model', 'test_class', $this->pkgHandle),
);
Loader::registerAutoload($classes);

Complete file: https://github.com/Remo/codeblog/blob/master/codeblog_classloader/controller.php

If you want to load a helper, replace the first parameter “model” with “helper”. The second parameter is the file name but without the file extension and the last parameter is the handle of the package where our class is located. Once we’ve specified the class names, we can pass it on to Loader::registerAutoload and are almost finished.

When you now want to use our “TestClass”, you can simply use this code:

echo TestClass::saySomething();

Complete code: https://github.com/Remo/codeblog/blob/master/codeblog_classloader/tools/test.php

You can find a working package here https://github.com/Remo/codeblog/tree/master/codeblog_classloader
Once you’ve installed it, you can call the tools file to test everything by opening “/index.php/tools/packages/classloader/test”, e.g. http://localhost/index.php/tools/packages/classloader/test


concrete5 – programmatically creating a page alias

in concrete5 you can create an alias if you want a page to appear at two different locations. If you look at the following site structure, you can see that we have two categories and two different services we’d like to offer.

alias_1

For whatever reason, we’d like to make sure that our main service shows up beneath both categories. It’s physical location is right under the first category but how do we add an alias underneath the second category? In the UI this is super easy, just drag the service to the second category and release the mouse button – a dialog will show up where you can select that you want to create an alias and that’s it! But how do we the same using code? It’s also pretty simple:

1
2
3
4
<?php
$pageToAlias = Page::getByPath('/category-1/service');
$parentOfAlias = Page::getByPath('/category-2');
$newAlias = $pageToAlias->addCollectionAlias($parentOfAlias);

I’ve used Page::getByPath to get both page objects but you can of course use Page::getByID or anything else that returns a valid page object. As soon as you’ve run this code, you’ll have an alias in your sitemap like that:

alias_2


concrete5 – smart attribute/picture fetching through page hierarchy

In this article I’m going to explain a nice code that works with attribute. It’s something quite a few people are using but it never crossed my mind to write something about it until my friends from 100pro asked for it.

Let’s start with a quick look at the problem we’re going to solve. Our page layout is pretty simple, two columns, some content and in our case the most important part: A picture in the head of every page:

attribute_recursion_header_pic

Assuming we’ve got the following structure in our sitemap:

attribute_recursion_sitemap

As you can see, this company has two slightly different offers on their site. Due to that, the boss wants to have different pictures that match the two topics. Easy, you might say, just add a block in the header of each page – until you notice that there are quite a few pictures & videos and thus lots of pages. Still easy you might say, why not create two page types and use the page type defaults to manage these pictures? Well, you could do that but using a page type for that feels wrong and sometimes it’s not that clear that you need two different pictures.

Silly story short: We want to specify a picture for “Business 2 Business” which is used on that page as well as all its children and we also want to specify a picture for “Funny Things” and its children.

Use an attribute from parent pages

We’re going to use an attribute to assign a picture to these two pages. If you’re logged in, open this page on your site: /dashboard/pages/attributes/. At the bottom, select “Image/File” and hit “Add”. Enter “header_pic” for handle and “Header Picture” for name.

Next, go back to the sitemap /dashboard/sitemap/full/ and click on “Business 2 Business” and then “Properties”. If you switch to “Custom Attributes” and scroll to the bottom, you’ll find our new attribute. Click on it and select a picture of your choice. Save everything and do the same for the second page “Funny Things”. Now that we’ve assigned the two pictures to our pages, it’s time to do the coding.

Fetch attribute from parent pages

This step might look slightly different depending on your theme but should be farily easy to adapt with a basic understand of HTML. The header area you want to replace with the picture selected in the attribute is mostly likely found in elements/header.php of your theme. In my case, the part we have to modify looks like this:

1
2
3
4
5
6
7
8
9
10
<div id="header-area">
   <div class="divider"></div>
   <div id="header-area-inside">
   <?php 			
   $ah = new Area('Header');
   $ah->display($c);			
   ?>	
   </div>				
   <div class="divider"></div>
</div>

Looks have a look at the comment code that replaces the code above:

1
2
3
4
5
6
7
8
9
10
11
12
13
14
15
16
17
18
19
20
21
22
23
24
25
26
27
28
29
30
31
32
33
34
35
36
37
<div id="header-area">
    <div class="divider"></div>
    <div id="header-area-inside">
        <?php
        $nh = Loader::helper('navigation');
        $ih = Loader::helper('image');
 
        $c = Page::getCurrentPage();
 
        // get list parent pages of current page
        $collectionTrail = $nh->getTrailToCollection($c);
 
        // add current page to array
        array_unshift($collectionTrail, $c);
 
        // loop through all the pages back to the home page
        foreach ($collectionTrail as $page) {
            // get attribute from page
            $picture = $page->getAttribute('header_pic');
 
            // check if attribute on page exists
            if ($picture instanceof File) {
                // make sure the picture isn't bigger than 800x300, cameras
                // these days take huge pictures
                $thumbnail = $ih->getThumbnail($picture, 800, 300, true);
 
                // print thumbnail
                echo "<img src=\"{$thumbnail->src}\" alt=\"\"/>";
 
                // stop searching through more pages
                break;
            }
        }
        ?>	
    </div>				
    <div class="divider"></div>
</div>

This code uses the navigation helper to get a list of all the parent pages and then loops through all of them until a page is found where the attribute with the handle “header_pic” has a valid file. In this case, we replaced the existing area but you can of course also keep it and add the code shown above as an extension.

The method “getTrailToCollection” is usually used to build a breadcrumb like navigation. There’s an autonav template called “breadcrumb” that does that as well but if you wonder how to create a breadcrumb navigation with code, here’s an example:

1
2
3
4
5
6
$nh = Loader::helper('navigation');
$c = Page::getCurrentPage();
$collectionTrail = array_reverse($nh->getTrailToCollection($c));
foreach ($collectionTrail as $page) {
    echo "<a href=\"{$nh->getLinkToCollection($page)}\">{$page->getCollectionName()}</a> ";
}

I hope you were able to get nice pictures with little effort into your site! If not, post a comment and I’ll do my best to get it fixed!